APPLICATION NOTE NO. 51
Using a TC Duct on Pumped SBE 19 (not 19plus) SeaCATs
March 2001
![]()
An SBE 19 SeaCAT is often equipped with a pump to reduce dynamic errors. However, in some applications (e.g., on a water sampler or underwater vehicle), the conductivity cell intake may be in the wake of the instrument package, where disturbed flow can cause errors (spiking) in salinity data. In these cases, SeaCAT data quality can be further improved by installing a temperature and conductivity duct (TC Duct).
The TC Duct changes the flow direction at the intake 90 degrees from the normal axis and forces the temperature and conductivity measurements to be made on the same parcel of water. The improved flow and spatial coordination of the sampled volume reduces salinity spiking errors.
Since the SeaCAT sampling rate and response time is much slower than a 911plus or SBE 25 CTD, the time lag between the T and C measurements (determined by the pumping rate and length of TC Duct tubing) is essentially insignificant and does not require a compensating data-processing step.
Installation of SeaCAT TC Duct Kit #50236
Description: TC Duct Kit #50236 consists of the following:
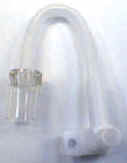 SeaCAT TC Duct Assembly |
Screw, 6-32 x 1 inch, stainless steel |
 Disposable syringe, 1cc of silicone grease (Dow DC-4) |
Procedure:
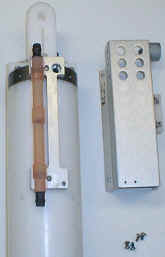
|
1. Remove the four screws on the cell guard. Set the guard and screws aside. |
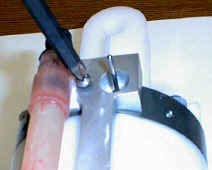
|
2. Remove the upper cell-tray screw. Store the screw for possible later use. |
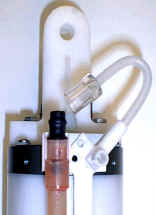 |
3. Place the TC Duct over the thermistor probe. Align the hole in the duct with the probe. Carefully push the duct down toward the cell tray so the probe penetrates through the hole. |
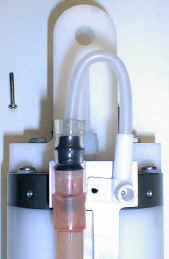
|
4. Rotate the duct assembly and insert the polyethylene tubing into the end of the glass conductivity cell. Fit the clear tygon tubing over the end of the cell and push it to the edge of the black coating. Be careful to avoid side-to-side strain on the cell end. 5. Insert the tip of the syringe into the hole for the cell tray screw. Fill the hole with the DC-4 grease. 6. Secure the TC Duct assembly with the 1 inch screw provided. Wipe away any excess DC-4. |
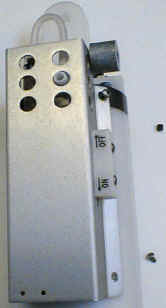
|
7. Re-install the cell guard using the four screws. |
| Date | Description |
| Initial release. |
![]()
Sea-Bird Home Phone: (+1) 425-643-9866 E-mail: seabird@seabird.com